
What you’ll need:
- Halloween treat bags
- Coloured pencils
- Tissue paper
- Ribbon
- Scissors
- Treats
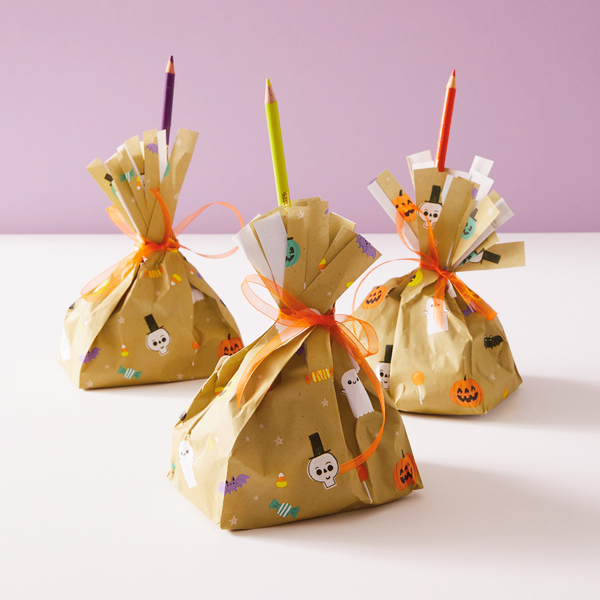
Nothing beats an elevated but easy Halloween treat bag—especially if you can make it as cute as this one! Inspired by the Sanderson Sisters from Disney Hocus Pocus, we decided to turn these treat bags into brooms fit for a moonlit ride through the skies.
All you need is a few simple supplies; we’ll show you the rest!
Inspired? Create and share by tagging @Hallmark_Canada.
What you’ll need:
Cut a couple inches off the top (opening) of the treat bag. Then with the top of the bag facing toward you, cut into the bag about half of the way down, making strips of fringe about 1/2″ wide.
Add a few handfuls of treats to the bottom of your treat bag.
Grab some tissue paper, scrunch it into a loose ball and place it on top of the treats inside the bag. This will give the bag volume when you tie it shut.
Close the top of the bag up, gather the fringe together, and tie it off tight with a piece of ribbon.
Finally, stick a brand new coloured pencil (or a few!) in the top of the treat bag to serve as the witch’s broom handle.
Abracadabra! Now you have some witchy broom treat bags ready for boo-ing.
Put your broom at the centre of a boo bag!
Ever booed someone on Halloween? No, not in a heckling way—with a boo bag or basket left on their doorstep as a fun surprise. 🎃
We hope this Halloween treat bag inspires some ghoulish glee in the ones you share them with!
Looking for more Halloween hijinx? We’ve got some fun ideas here:


