DIY clay bowls: easy to make and fun to give

By Hallmark staff on April 23rd, 2025
17974 DIY Clay Bowls 1

“The perfect craft doesn’t exist.” Welp, explain these DIY clay bowls, then. 😎

They take just minutes to make, which means it’s super easy to create a bunch and keep them on hand. Plus, paired with simple add-ons like jewellery, candles or plants, they make thoughtful gifts with a sweet, personal touch. See how to make two different kinds of bowls with our simple directions below!

Inspired? Create and share by tagging @Hallmark_Canada.

17974 DIY Clay Bowls 1
17974 DIY Clay Bowls 2

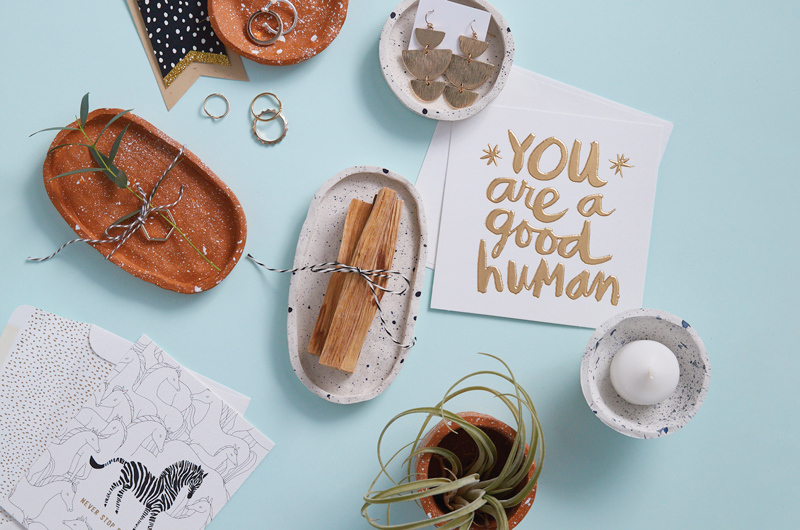
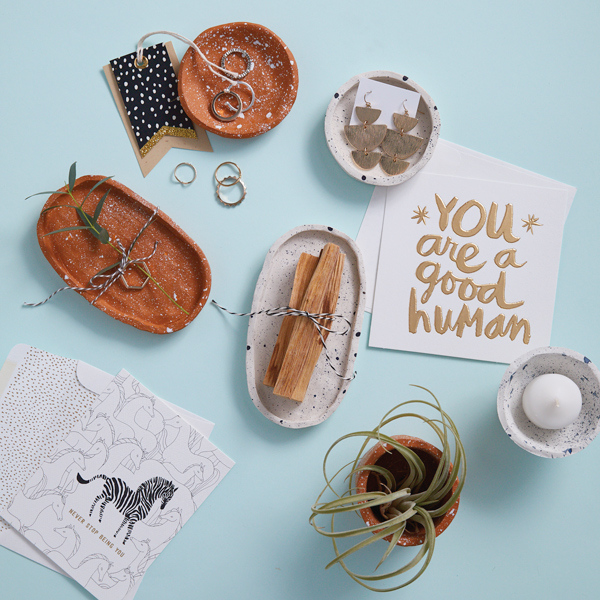
First, grab your DIY clay bowl supplies:

• Oven-bake clay
• Acrylic craft paint
• Stiff toothbrush
• Scrap paper
• Craft knife
• Ruler
• Clay blending tool (or you can use your fingers)
• A variety of small glass bowls (oven-safe if needed)
• Rolling pin
• Sheet pan
• Baking parchment

Pro tip: Make a bunch in several sizes and stash them in your gift closet.

17974 DIY Clay Bowls 3

Next, prepare your clay:

If needed, follow the package instructions to condition your clay. Once you’ve warmed up the clay, make a ball and flatten it with a rolling pin on a piece of parchment. Roll to about 1/4″ thick.

#

Make your bowls

17974 DIY Clay Bowls 4

To make a simple round base, place a glass bowl upside down on the clay and trace around the edge with a craft knife.

To make an oblong-shaped base, use a bowl to create the rounded ends by tracing around just half of the bowl with a craft knife. Then move the bowl a few inches away and trace around the opposite half of the bowl. You’ll now have two half circles (rounded ends) facing each other. Use a ruler to connect the two rounded ends, or for a handmade look, cut the sides freehand.

17974 DIY Clay Bowls 5

Next, using a ruler as a guide, you’ll cut a strip long enough to wrap around the base. This will be the sides of your dish.

Since it can be kinda hard to measure circumference (without geometric formulas, anyway), a piece of string or a cloth tape measure might be helpful here!

17974 DIY Clay Bowls 6

Wrap the side piece around the base and use the craft knife to cut off any overlap.

17974 DIY Clay Bowls 7

Use the blending tool or your fingers to smooth the seams together on the inside where it meets the base.

Pro tip: If you’d like to make your vessel more leak-proof, roll a thin, skinny snake of clay with your fingers and press into the inside seam. Blend it down into the base and up into the side.

17974 DIY Clay Bowls 8

Make sure to also smooth the seams on the outside where you joined the side piece together.

17974 DIY Clay Bowls 9

Next, preheat your oven according to the package directions for the clay.

Place the bowls on a sheet pan lined with parchment paper and bake according to instructions.

Pro tip: Make a foil tent to cover the pieces—this will help make sure the pieces don’t brown or burn from the heat.

#

Another method: Baking clay in oven-safe glass bowls

This method requires a little less blending, since you’re relying on the bowl itself to hold the shape of the clay while it bakes.

The key here is to make sure the bowl you’re using is oven-safe—do not use a cereal bowl or other ceramic or porcelain bowl.

Here’s how to do it:

  1. Trace an oven-safe glass bowl with a craft knife.
  2. Press the circle of clay into the bottom of the bowl.
  3. Use the craft knife to level the sides and smooth the edges with your fingers or the blending tool if needed.
  4. Place the bowl with the clay inside on a baking sheet lined with parchment paper and bake according to directions above for ONLY five minutes.
  5. After five minutes, carefully remove the bowl from the oven and allow it to cool enough to touch. Run a craft knife between the clay and the bowl to release it.
  6. Place your clay bowl back on the parchment-covered tray and bake for the remaining time (according to package instructions).
#

How to spatter-paint your DIY clay bowls

17974 DIY Clay Bowls 10

In a bowl, dilute some paint with a little bit of water. Practice your spatter technique on the piece of scrap paper first by dipping the bristle tips of the toothbrush into the paint, then trying some of these methods:

  • Wrap your fingers around the head of the toothbrush and firmly scrape your thumb across the bristles in one direction to “spray” the paint.
  • Try pointing the bristles down and tapping the back of the brush.
  • To make bigger dots, gently touch the bristles directly on the clay.

The goal is to make dots of different sizes instead of streaks—so practice until you get the right ratio of water to paint.

17974 DIY Clay Bowls 11

Be sure to keep dipping your toothbrush into the water and paint mix. Keeping the brush wet is a key part of spatter painting.

17974 DIY Clay Bowls 12

As far as when to paint your DIY clay bowls, you can paint them before or after you bake them.

  • Paint before baking if you don’t want to wait for the paint to dry.
  • Paint after baking if you want to see what colour the clay is when it dries, before deciding on what colours to use when spatter painting.

If you choose to paint after baking or decide to give the bare clay a base coat for some sheen or gloss, just make sure the clay is completely cool before painting.

17974 DIY Clay Bowls 13

Pro tips:

  • If you plan to use your DIY clay bowl as a planter, poke a hole in the bottom before baking.
  • Use sandpaper after baking to smooth out any rough patches.
#

Gift ideas for your DIY clay bowls

17974 DIY Clay Bowls 15

You can totally just give a set of your beautiful bowls away as presents without extra items included. But to plus it up even more, we suggest adding:

  • Mini cards
  • Luggage tags, if they’re always on the go
  • Plants, plant seeds or these DIY plant markers, pins and tags.
  • Cute rings, earrings and other jewellery like we mentioned above. We love handmade friendship bracelets for a personal touch!
  • A recipe you love handwritten on pretty stationery.
  • Candles
  • Cute magnets to stick on the fridge
  • Little photos of you and the recipient, or random silly ones you like.
  • Stickers
  • Tiny bookmarks
  • Mini ornaments, especially these ridiculously adorable magnetic Better Together ones
  • Mini nail polishes
  • Tea or hot cocoa packets
  • Keychains
  • Scented hand sanitizers
  • Bath soap bars
  • A special pastry
  • Lip balms

Note: Don’t use dishes made of polymer clay for burning Palo Santo or stick incense, or for serving food.

We hope you’re ready to roll up your sleeves and start crafting some DIY clay bowls! Make and save these for your next gifting occasion for a personalized gift they won’t forget. ❤️