DIY gift for Mom: block print tea towels and bandanas

By Hallmark staff on April 23rd, 2025
Block Printing ii 1

This step-by-step guide shows you how to create your own pretty, printed tea towels to give as a DIY gift for Mom this Mother's Day. We'll even show you a few ways to use them as gift wrap, for a thoughtful bundle she'll love.

Crafter level: Beginner

Time needed: 2 hours

Inspired? Create and share by tagging @Hallmark_Canada.

Block Printing ii 1

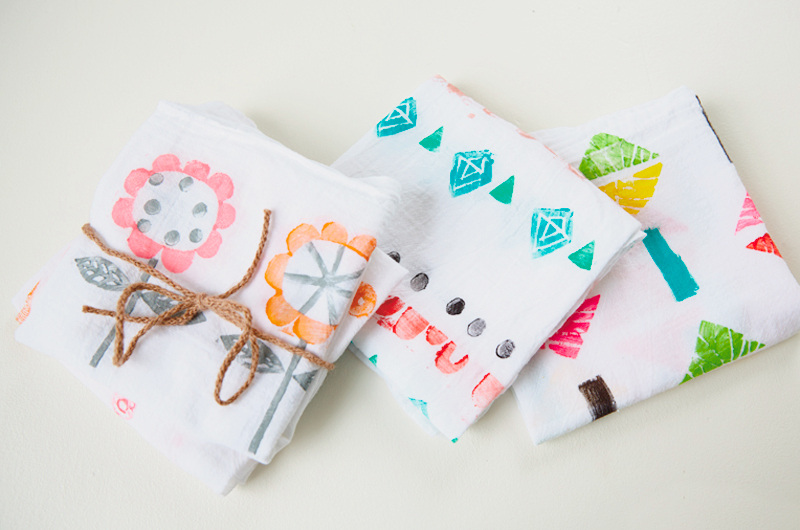
Even as an adult, it’s fun to give your mom a handmade gift to celebrate her on Mother’s Day, her birthday or just because. Block printing—also called rubber stamping and linocut printing—is a simple way to add a colourful personal touch to always-useful tea-towels and bandanas.

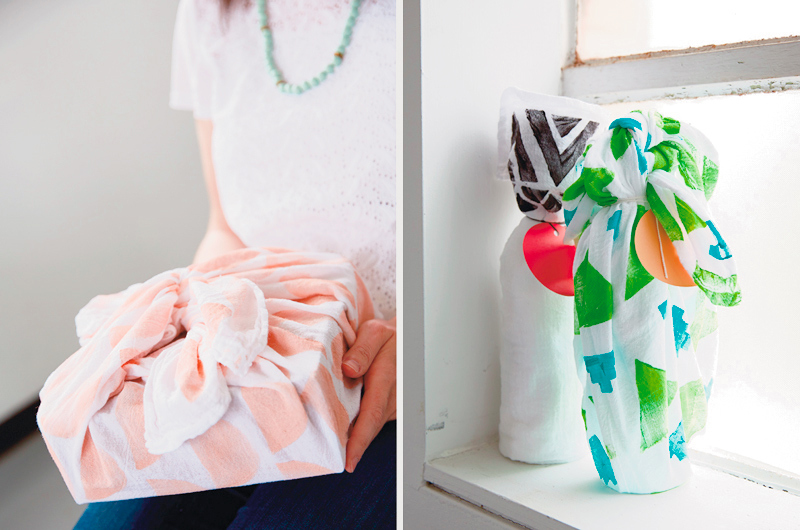
Even better: You can use the stamp you make to create multiples, like bandanas in different colours or a monogrammed set of tea towels. Hallmark designers made a batch to show us how it’s done.

Even Easier DIY Towels

We’ve simplified the whole process with Tea Towel Handprint Kits. You’ll get everything you need to add your family’s hand-prints to cute towels (on purpose and in cute colours instead of dirt for once).

Materials

  • Tracing paper
  • Pencil
  • Soft Cut or Speedball "Speedy Carve" linoleum blocks, 2" x 2" square
  • Linoleum cutter or rubber stamp carving tools
  • White tea towels or bandanas
  • Fabric paint
  • Brayer or foam paint brush
  • Paper plate
#

Directions

Block Printing ii 3

Step one:

Make some 2” squares on your tracing paper and sketch some simple designs: Try flowers, hearts, rainbows, flowers, stars leaves, geometric shapes or letters.

When you like your sketch, go over it with the pencil again, pressing down harder. Then flip the tracing paper over, sketch side down, on a piece of the linoleum block and rub over the lines with your pencil so the lead on the transfers to the rubber.

Block Printing ii 4

Step two:

Use the cutting tools to carve out the rubber where you don’t want colour. Try the larger cutting tools to carve out bigger spaces and smaller ones to get close to the shapes you’re going to leave.

When you’re hollowing out your stamp, don’t worry about being perfect. Block printing looks great when backgrounds have little bits of colour where you left some rubber.

Block Printing ii 5

Step three:

Your stamp is ready! Squirt a little fabric paint on to a paper plate and roll the brayer until it’s completely—but thinly—covered. If you’re using a foam brush, don’t overload it.

Before you block print on the towel or bandana, practice stamping on plain paper or scrap fabric to see how much paint coverage you’ll need and how you want to space your design. You can also wipe off the stamp and cut out more rubber if you need to.

Block Printing ii 6

Step four:

To print, carefully press the stamp on to the fabric and lift it off slowly. If you’re stamping more than once, apply more paint each time.

Here are some different ways to make different designs with the same stamp:

  • Stamp your design once, in a cluster, in a row or all over.
  • Keep the design aligned the same way for every stamp or rotate it one turn clockwise and make the second print right next to the first. Repeat to cover the whole surface.
  • Use different, complementary colours—just be sure to wipe the stamp clean before applying a new hue.
  • Paint different parts of your stamp different colours.

Or add another stamp with a new colour for lots more options!

Block Printing ii 7

Step five:

Let your design dry while you make more. Why stop at just one? When you finish, follow the instructions on the fabric paint to make sure it sets permanently.

Now they’re ready to give as gifts and use to wrap presents. Ideas on that below!

Block Printing ii 8

Ways to give your block print gifts

You can give your linocut bandanas and tea towels in approximately a gazillion ways. Here are a few we love.

Tie together a set of colour-coordinated towels, napkins or bandanas

  • Fold the towels or bandanas neatly. (You can iron them, if you’re that person.)
  • Stack them up and tie them with a piece of twine, yarn or ribbon.
  • Add a gift tag or pom poms, or tuck a card under the bow.
Block Printing ii 9 NEW

Wrap up a box of chocolates, a book or two, or a homemade treat

  • Lay the towel or bandana printed side down.
  • Centre the box or book with its straight edges lined up with the corners of the fabric.
  • Fold two opposite corners over the gift. You’ll get the tidiest results if the edges of the fabric run parallel to each other.
  • Pull up the remaining two corners and tie them in a single or double knot. (You might have to try a few different arrangements to get it just right. The good news is, this wrap is reusable.)
  • Add a gift tag or tuck in a card.

Give a bottle of her favourite beverage

  • Lay the towel or bandana printed side down.
  • Stand the bottle in the centre of the fabric.
  • Pull two opposite sides up and hold them against the bottle.
  • One at a time, pull up each corner, folding the remaining straight sides in as you do.
  • Use a rubber band to hold the fabric around the neck of the bottle, then secure it by tying on a gift tag with twine or a ribbon. (You can remove the rubber band or not.)